
Monday 28 October 2013

Just in time before Halloween make these cute and completely simple witch brooms.
Materials:
- Yarn in dark brown and a colour suitable for the broom bristle (I use 8ply)
- Crochet hook (I use 3mm)
- Scissors
- Glue
Method:
Making the stick
Using your dark brown
R1: 5SC Magic circle
R2-19: EVEN (5)
ST and finish off
Using your bristle coloured yarn cut about 30-40 (maybe more or less depending on the effect you want) 9cm strips. They don't need to be completely accurate as you will be trimming so parts down when you shape it.
Grab your stick and arrange the bristle strips as evenly as you can around the end of the stick (where you ST) towards the toplike shown in the photo below.

You will notice there is still a big hole in the middle of all the bristles, this is where the glue comes in. Squeeze some glue into the middle of the bristles and squish it together. You can stop here but to make it more of a cone shape trim some of the outer strips.
If you crocheted the stick tight enough you should be able to mold it to look like the completed product to make it look like a witch will sit and ride on it.
The broom is now complete. I hope that without a video this is still understandable, don't hesitate to ask me if you don't understand anything.
Happy Crafting :)
Kim
Sunday 20 October 2013

Halloween is almost here and I have for you guys another amigurumi tutorial.
It's very simple but also very cute and very customisable :)
Video Tutorial:
Materials:
- Yarn in your choice of cauldron colour (I use 8ply)
- Crochet hook (I used 3mm and 3.5mm)
- Stuffing
- Wire (I used a bobby pin and head pin)
- Jewellery pliers
- Your choice of decorations
Method:
Using your choice of cauldron yarn:
R1: 6SC Magic circle
R2: INCx6 (12)
R3: (INC, 1)x6 (18)
R4: (INC, 2)x6 (24)
R5: (2, INC, 1)x6 (30)
R6: (INC, 4)x6 (36)
R7: (INC, 5)x6 (42)
R8-12: EVEN (42)
R13: (5, DEC)x6 (36)
R14: (4, DEC)x6 (30)
R15: (1, DEC, 2)x6 (24)
R16-17: EVEN (24)
R18: (2, INC, 1)x6 (30)
R19: (8, DEC)x3 (27)
ST finish off
Curl the opening of the cauldron down to make the top boarder.
Stuff the cauldron but don't make it too neat, you want some of it to be sticking out to give it an over boiling effect.
Using ur jewellery pliers bend your wire into a sort of horseshoe shape and thread it through the top boarder of the cauldron.
You're now free to decorate your cauldron with any type of 'ingredients' as you'd like.
I personally used some googly eyes, snake eyes, salmon yarn for fake worms and polymer clay cane slices.
Be creative and have fun.
If you end up making one feel free to head on over to my Facebook page and show me a photo.
Happy Crafting ^^
Kim
Thursday 10 October 2013

As a few of my subscribers may have noticed I have been working on my Adventure Time crochet update for a very long time. It would've been done much sooner if I wasn't so lazy. I'm also sad that I couldn't get a Marceline done because I couldn't find yarn matching her skin tone. Although I'm also wrong with a lot of the colours in a few of the characters I couldn't find any yarn close to Marceline's skin colour.
Video for thorough look at them all:
Lady Rainicorn:

The hardest part about this was deciding how I was going to do the hair, in the end I went with fleece although it's coming apart a bit.
I knew that crocheting the horn wouldn't of looked so nice so I used modelling clay and put a headpin through it that way if I ever what to change it I can easily remove it
LSP:

I thought I was going to have problems with positioning the lumps and I was sort of right but as you can tell from the photo it's not noticable.
Really happy with how she turned out and I wasn't left in a stressful mess after finishing her like most of my amis.
BMO:

I had a bit of trouble with the little details especially the BMO and as you can see the M isn't really recognisable but I still think it's cute non the less.
The back is really deformed and ugly but hey, no ones gonna see anything but the front.
I also couldn't find an exact match to BMO's body colour so went with a turquoise that leaned more on the green side.
Princess Bubblegum:

I had problems figuring how to do her jewel and ended up colouring a black dot eye with nail polish. The crown is just very disproportionate but her hair isn't the same length on both sides which I don't have a clue how that could be looking at my pattern so the OCD in me has my eye twitching.
There's more I could critique about this but I'll leave it at that before this turns to an essay @.@
Jake:

Originally he had a more toyish plain black eye but decided to swap them for the proper eyes and like it a lot better that way
The only thing I think I would try to improve it I were to make him again are the ears.
Finn:

I'm not exactly sure how I can make his nubby ears without having it concave in where the ear meets the head.
I also couldn't find the right blues for his clothes but I don't think it's too obvious.
The facial expression is also a wee bit creepy but I sort of like that aspect of it.
It's like a weight off my shoulder to finally get this done so I can move onto my next series set which I'm letting people on my Facebook page vote on.
Happy Crafting~
Kim <3
Thursday 3 October 2013

In preparation for Halloween I decided to make a tutorial on a candy corn amigurumi. I've never actually seen a candy corn in real life and I think this is pretty normal for Australians as a lot of us don't celebrate Halloween, but I've definitely seen my fair share on American shows and other things.
Materials:
- Yarn in yellow, orange and white (I use 8ply)
- Crochet hook no larger than 4mm (I use 3mm)
- Stuffing (I use hobbyfill)
- Scissors
- Stitch marker (optional
Video Tutorial:
Method:
Starting with the yellow yarn you want to CH 16
Now from the second ch to the hook SC15
In the same CH we just SC make an increase
We then SC13 and INC to give us 32 stitches
All of that will be regarded as R1.
R2: (15, INC)x2 (34)
R3: (15, INC, INC)x2 (38)
R4-5: EVEN (38)
R6: 16, DEC, 17, DEC, 1 (36)
R7: (16, DEC)x2 (34)
R8: change to orange yarn - EVEN (34)
R9: (15, DEC)x2 (32)
R10-12: EVEN (32)
R13: (14, DEC)x2 (30)
R14: EVEN (30)
R15: (DEC, 13)x2 (28)
R16: (12, DEC)x2 (26)
R17: (DEC, 11)x2 (24)
R18: (6, DEC)x3 (21)
R19: change to white yarn - EVEN (21)
R20: (5, DEC)x3 (18)
R21: (DEC, 4)x3 (15)
R22: (DEC, 3)x3 (12)
R23: (2, DEC)x3 (9)
R24: (1, DEC)x3 st and finish off (6)
Close the hole neatly by threading the tail through the outer stitches and pull tight.
Note: you can change colour anywhere you'd like during the pattern (if you don't want as much orange as mine), but the instructions are to create the same on as the photo indicated
I would like to point out that I made this pattern on the spot of making the tutorial so it isn't a perfect shape but hope you guys still like it.
If you make this I would love to see a photo which you can send to any of my social medias :)
Happy crafting,
Kim <3
Subscribe to:
Posts (Atom)
Popular Posts
-
 This is a very simple tutorial perfect for the absolute beginner and absolutely adorable. Materials needed: - Yarn in your choice of ...
 -
 Just in time before Halloween make these cute and completely simple witch brooms. Materials: - Yarn in dark brown and a colour suitabl...
 -
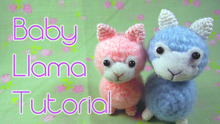
Hello fellow crafters and browsers :D From a few requests I have made a tutorial for my baby alpaca/llama. Please watch the video below an...
-
 I'm always hesitant with amigurumi tutorials but here we go with a very basic and easy Ice-cream in a waffle cone tutorial. Materia...
